
Panic Button Solutions in Singapore
Give staff a simple way to manually trigger an emergency alert when immediate assistance may be needed.
Web Security provides panic button solutions for offices, retail shops, clinics, reception counters and other workplaces where staff may need a discreet or accessible emergency trigger.
The final setup depends on the location, existing alarm system and the type of response required.
One Action. A Configured Response.
A fixed or compatible panic button is activated manually.
The connected alarm or security system receives the trigger.
The resulting alert depends on the installed equipment and system configuration.
Where Panic Buttons May Be Useful
Panic buttons are usually placed where staff may need quick access to a manual emergency trigger. The right location depends on the workplace, staff workflow and the type of risk being addressed.
Reception Counter
A panic button may be placed discreetly near the reception area where staff interact directly with visitors or members of the public.
Cashier & Service Counter
Retail staff may benefit from a discreet trigger near the cashier or service counter where cash handling or customer interaction takes place.
Reception & Consultation Areas
Clinics and other service environments may use panic buttons at reception or selected staff areas where assistance may occasionally be needed quickly.
Front Office & Management Areas
Offices may place panic buttons at selected locations where staff regularly interact with visitors, clients or members of the public.
Payment or Cash-Control Areas
A discreet emergency trigger may be considered in locations where staff regularly handle cash, payments or other sensitive transactions.
Selected Internal Areas
Depending on the workplace, panic buttons may also be installed in selected internal or staff-only areas where quick manual access is useful.
The Right Setup Depends on Where and How It Will Be Used
A panic button should be easy for authorised staff to reach, while still fitting naturally into the workplace. Different sites may need different mounting positions or connection methods.
Surface-Mounted Panic Button
A fixed panic button can be installed at a selected workstation, reception area or staff location where quick access is required.
Under-Table or Under-Counter Installation
Panic buttons can be positioned discreetly below a desk or counter so staff can reach them without making the trigger immediately obvious.
Wireless Panic Button Option
Some alarm systems may support compatible wireless panic devices where additional wiring is impractical or the installation needs more flexibility.
Connected to an Existing Alarm Input
Where the existing alarm panel supports it, a panic button may be added as a dedicated input or zone rather than installing a completely separate system.
More Than One Panic Point
Larger workplaces may require panic buttons at more than one location so selected staff can access a trigger without crossing the premises.
Different Systems Can Support the Same Emergency Response
A panic button is only one part of the security setup. Depending on the system, the panic trigger can work alongside alarm and CCTV functions to support a clearer response when an incident occurs.
Panic Button
Gives staff a direct way to manually trigger a configured emergency response when immediate assistance may be needed.
Alarm System
Receives the panic input and activates the programmed response, depending on the alarm panel and system configuration.
CCTV
CCTV can help staff or authorised users visually check selected areas and review what happened around the time of an incident.
From Manual Trigger to Situation Check
A New Panic Button Setup Is Different From Adding One to an Existing System
Some sites need a new panic-button setup from scratch, while others already have an alarm or security system that may be able to support an additional panic input.
Plan the Trigger Points Around Staff Workflow
For a new installation, panic-button locations can be selected based on where staff work, where they may need quick access and how discreet the trigger should be.
Check Compatibility Before Adding the Button
If an alarm or other compatible system is already installed, the current panel, inputs and configuration should be checked before a panic button is added.
Confirm the panel model, available zones or inputs and supported response.
Review whether the intended panic-button location can be connected cleanly.
Confirm what should happen when the panic button is activated.
Panic Buttons Installed for Real Workplace Use
These examples show how panic buttons can be installed on site, including discreet under-table placement where staff can reach the trigger quickly without making it immediately obvious.
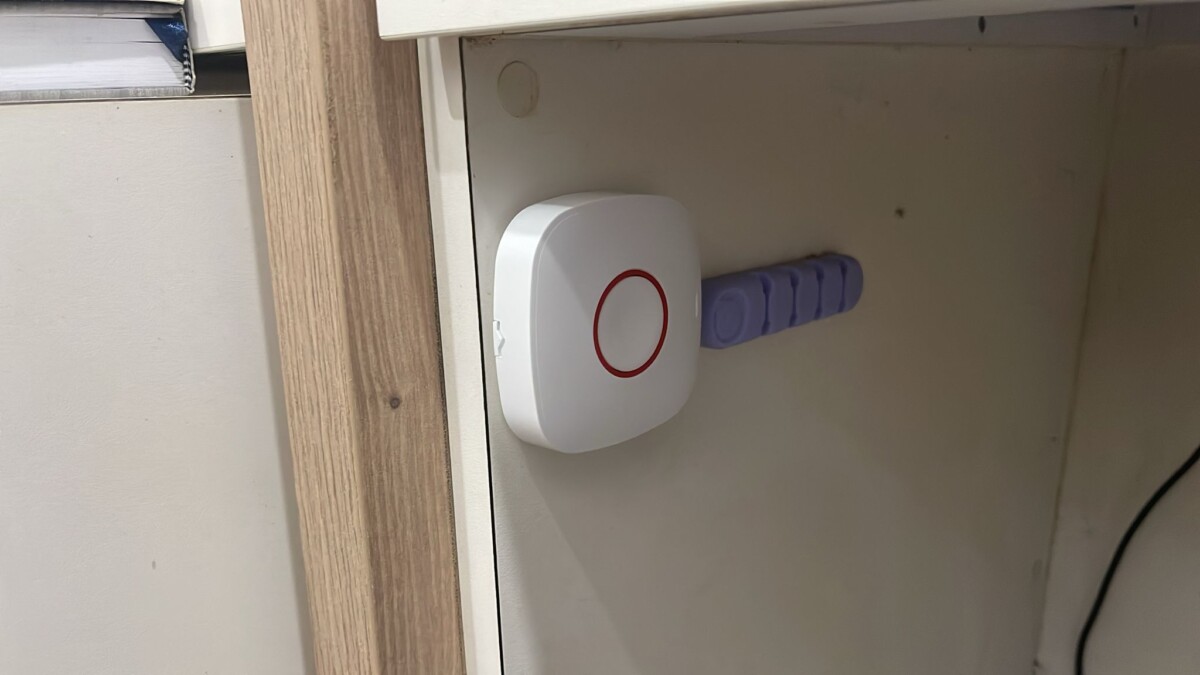
Fixed Panic Button Installation
A panic button installed at a selected workplace location for quick manual access when an emergency trigger may be needed.
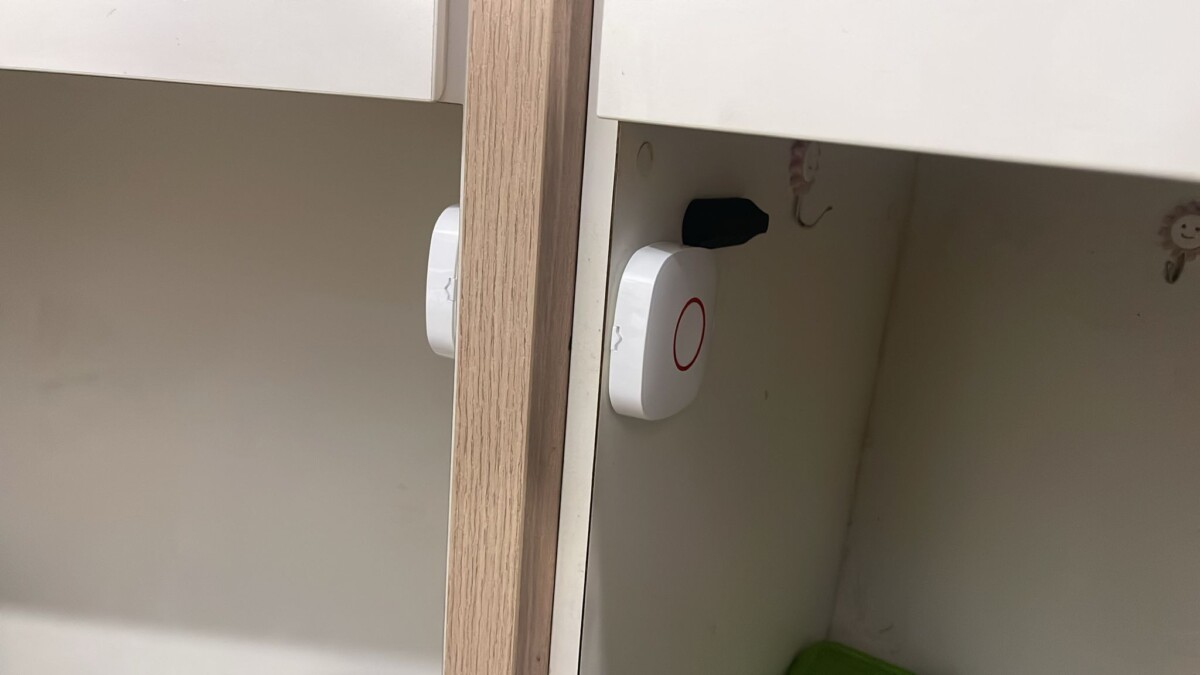
Under-Table Panic Buttons
Concealed placement can make the button easier for staff to access discreetly from their normal working position.
Staff should be able to reach the button without leaving their normal position.
The button can be positioned so it is not immediately visible to visitors or customers.
The final location should reduce accidental activation while remaining easy to access.
Common Questions About Panic Button Installation
Panic button setups vary depending on the workplace, alarm panel, wiring and the type of response required. These are some of the most common questions we receive.
A panic button provides a manual way for staff to trigger a configured emergency alert or alarm response when immediate assistance may be needed.
It is usually installed where authorised staff can reach it quickly, such as under a reception counter, cashier desk, workstation or selected staff-only area. The exact position should also reduce the chance of accidental activation.
Yes. Discreet under-table or under-counter placement is commonly considered when staff need access to the trigger without making its position obvious to visitors or customers.
It may be possible if the existing alarm panel has a compatible input, zone or supported device. The panel model, available capacity, wiring and required response should be checked before installation.
Some security and alarm systems support compatible wireless panic devices. Availability depends on the system being used and should be confirmed before deciding on the installation method.
Not necessarily. A panic button only triggers the response that has been configured for the connected system. The actual alert path depends on the equipment, monitoring arrangement and site procedure.
Yes, they can support the same emergency procedure. CCTV can help authorised users visually check or review the situation, although direct integration depends on the equipment and system configuration.
Yes. Larger workplaces may use multiple panic points at different counters, rooms or staff positions, subject to the system design and available inputs.
Tell Us Where You Need a Panic Button
Planning a new panic-button setup or adding one to an existing alarm system? Tell us about the workplace, intended button location and any existing equipment.
We can review the proposed placement, connection method and system compatibility before recommending the most suitable setup.
Where Will It Be Installed?
Reception counter, cashier desk, office workstation, clinic, staff-only area or another selected location.
Visible or Discreet Placement?
Let us know whether the button should be openly accessible or concealed under a table or counter.
New or Existing Alarm System?
If an alarm panel is already installed, share the model or a photo so compatibility can be reviewed first.